Introduction
In this article, we will review the steps needed to create a PTR or rDNS record for your VPS service.
This can easily be completed within the LaunchVPS control panel. IPv4 and IPv6 are supported.
Prerequisites
You will need:
- VPS from LaunchVPS
Step 1 - VPS Control Panel
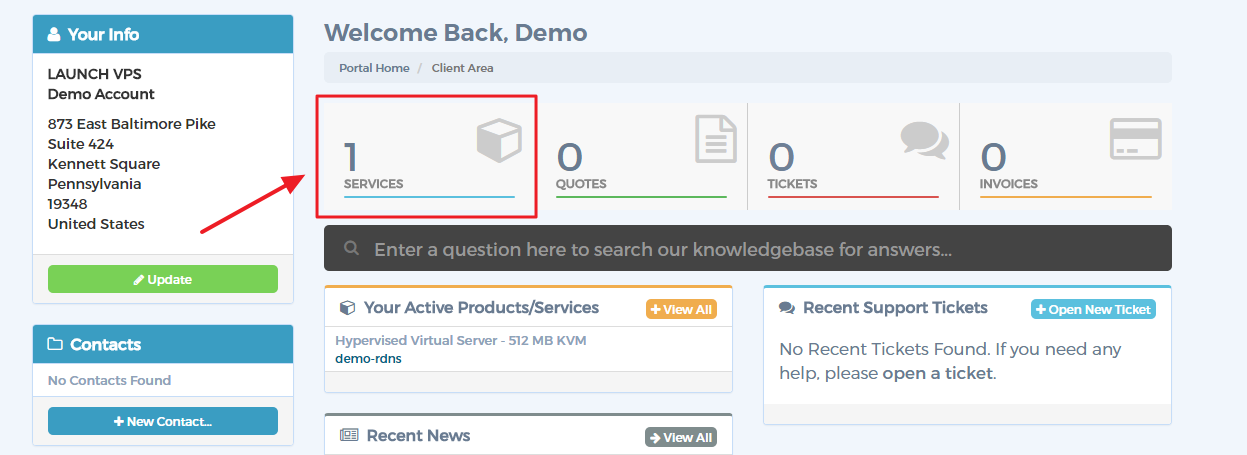
Select the Services icon in the control panel:

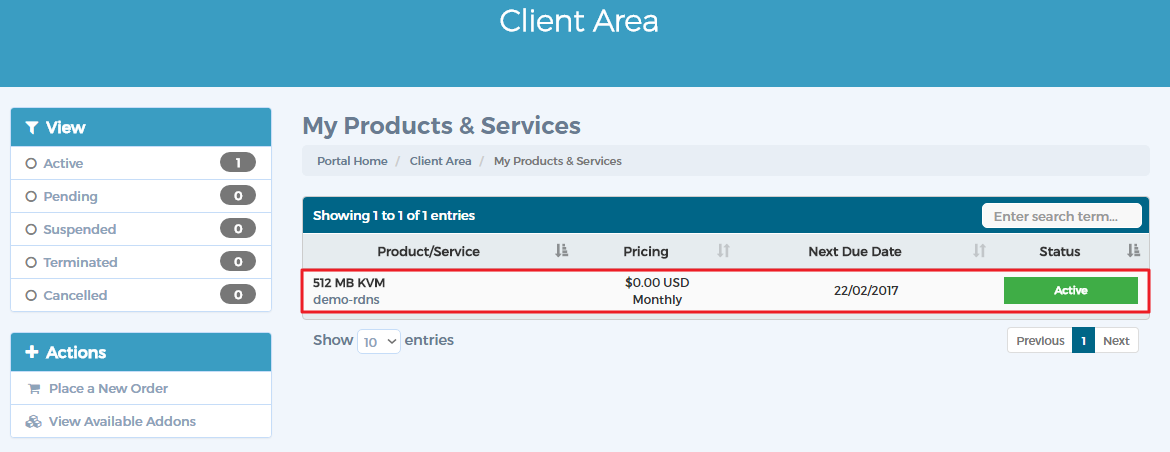
Select the service for which you wish to configure rDNS:

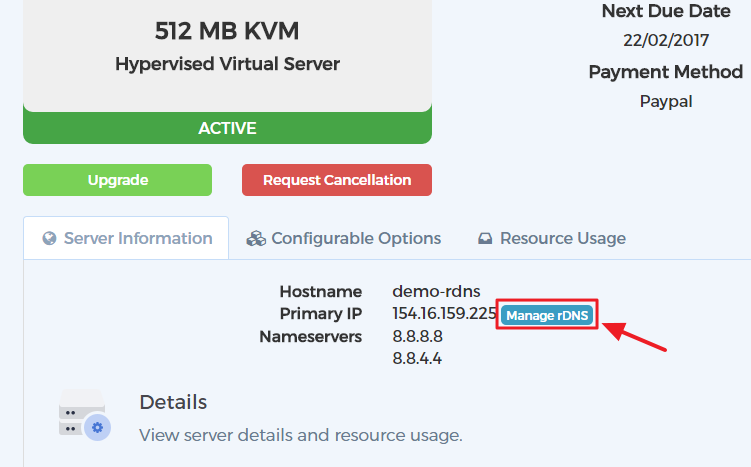
Click the Manage rDNS button located next to the dedicated IP for the VPS service:

STEP 2 - Add PTR
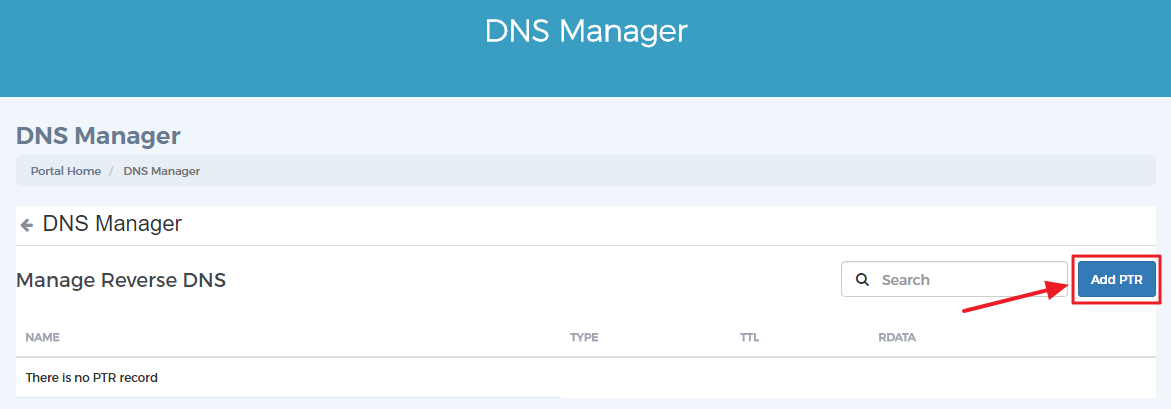
Click the Add PTR button:

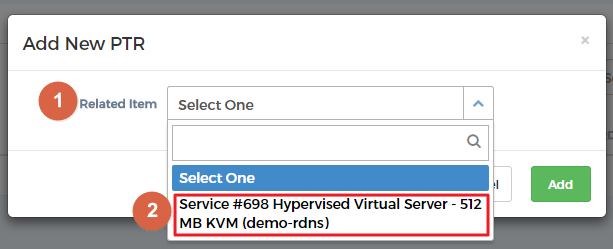
Click the Related Item drop-down, then select the service for which you plan to configure rDNS:
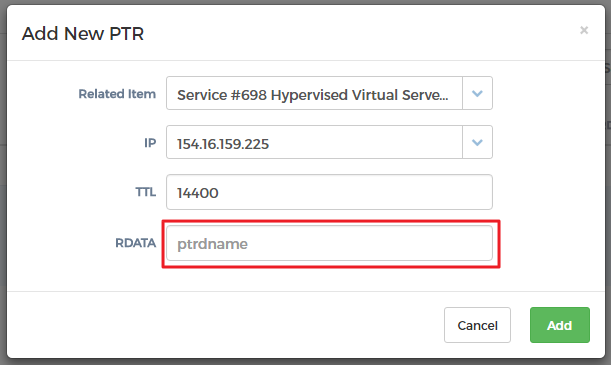
Some fields will now be auto-populated for you. For the RDATA field, enter the hostname that should be configured for rDNS. Example: rdns-serv01.domain.com.
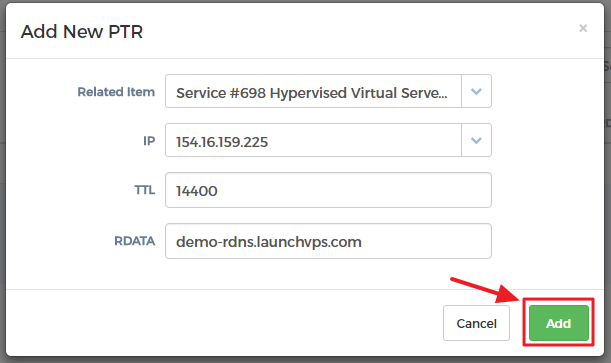
Click the Add button:
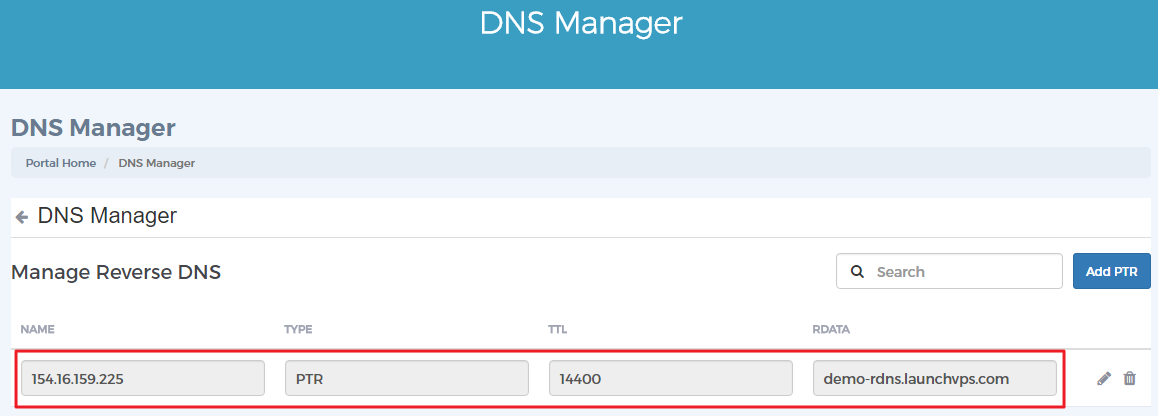
Your PTR record will now be listed and active:

Step 3 - Testing
Test the PTR record by running the host command followed by the IP address for which you have configured rDNS. The hostname you have configured should be reported. Example:


Conclusion
You have successfully configured rDNS for your VPS Service.

