We offer a feature for our security-conscious customers which allows further securing their control panel account to use two-factor authentication. This allows extra account protection, versus using just a password.
In order to use LaunchVPS's two-factor authentication, you will need a compatible client application. Please see our recommended compatible applications below.
Compatible applications:
- Google Authenticator
- Authy
- Authenticator +
- DUO Security
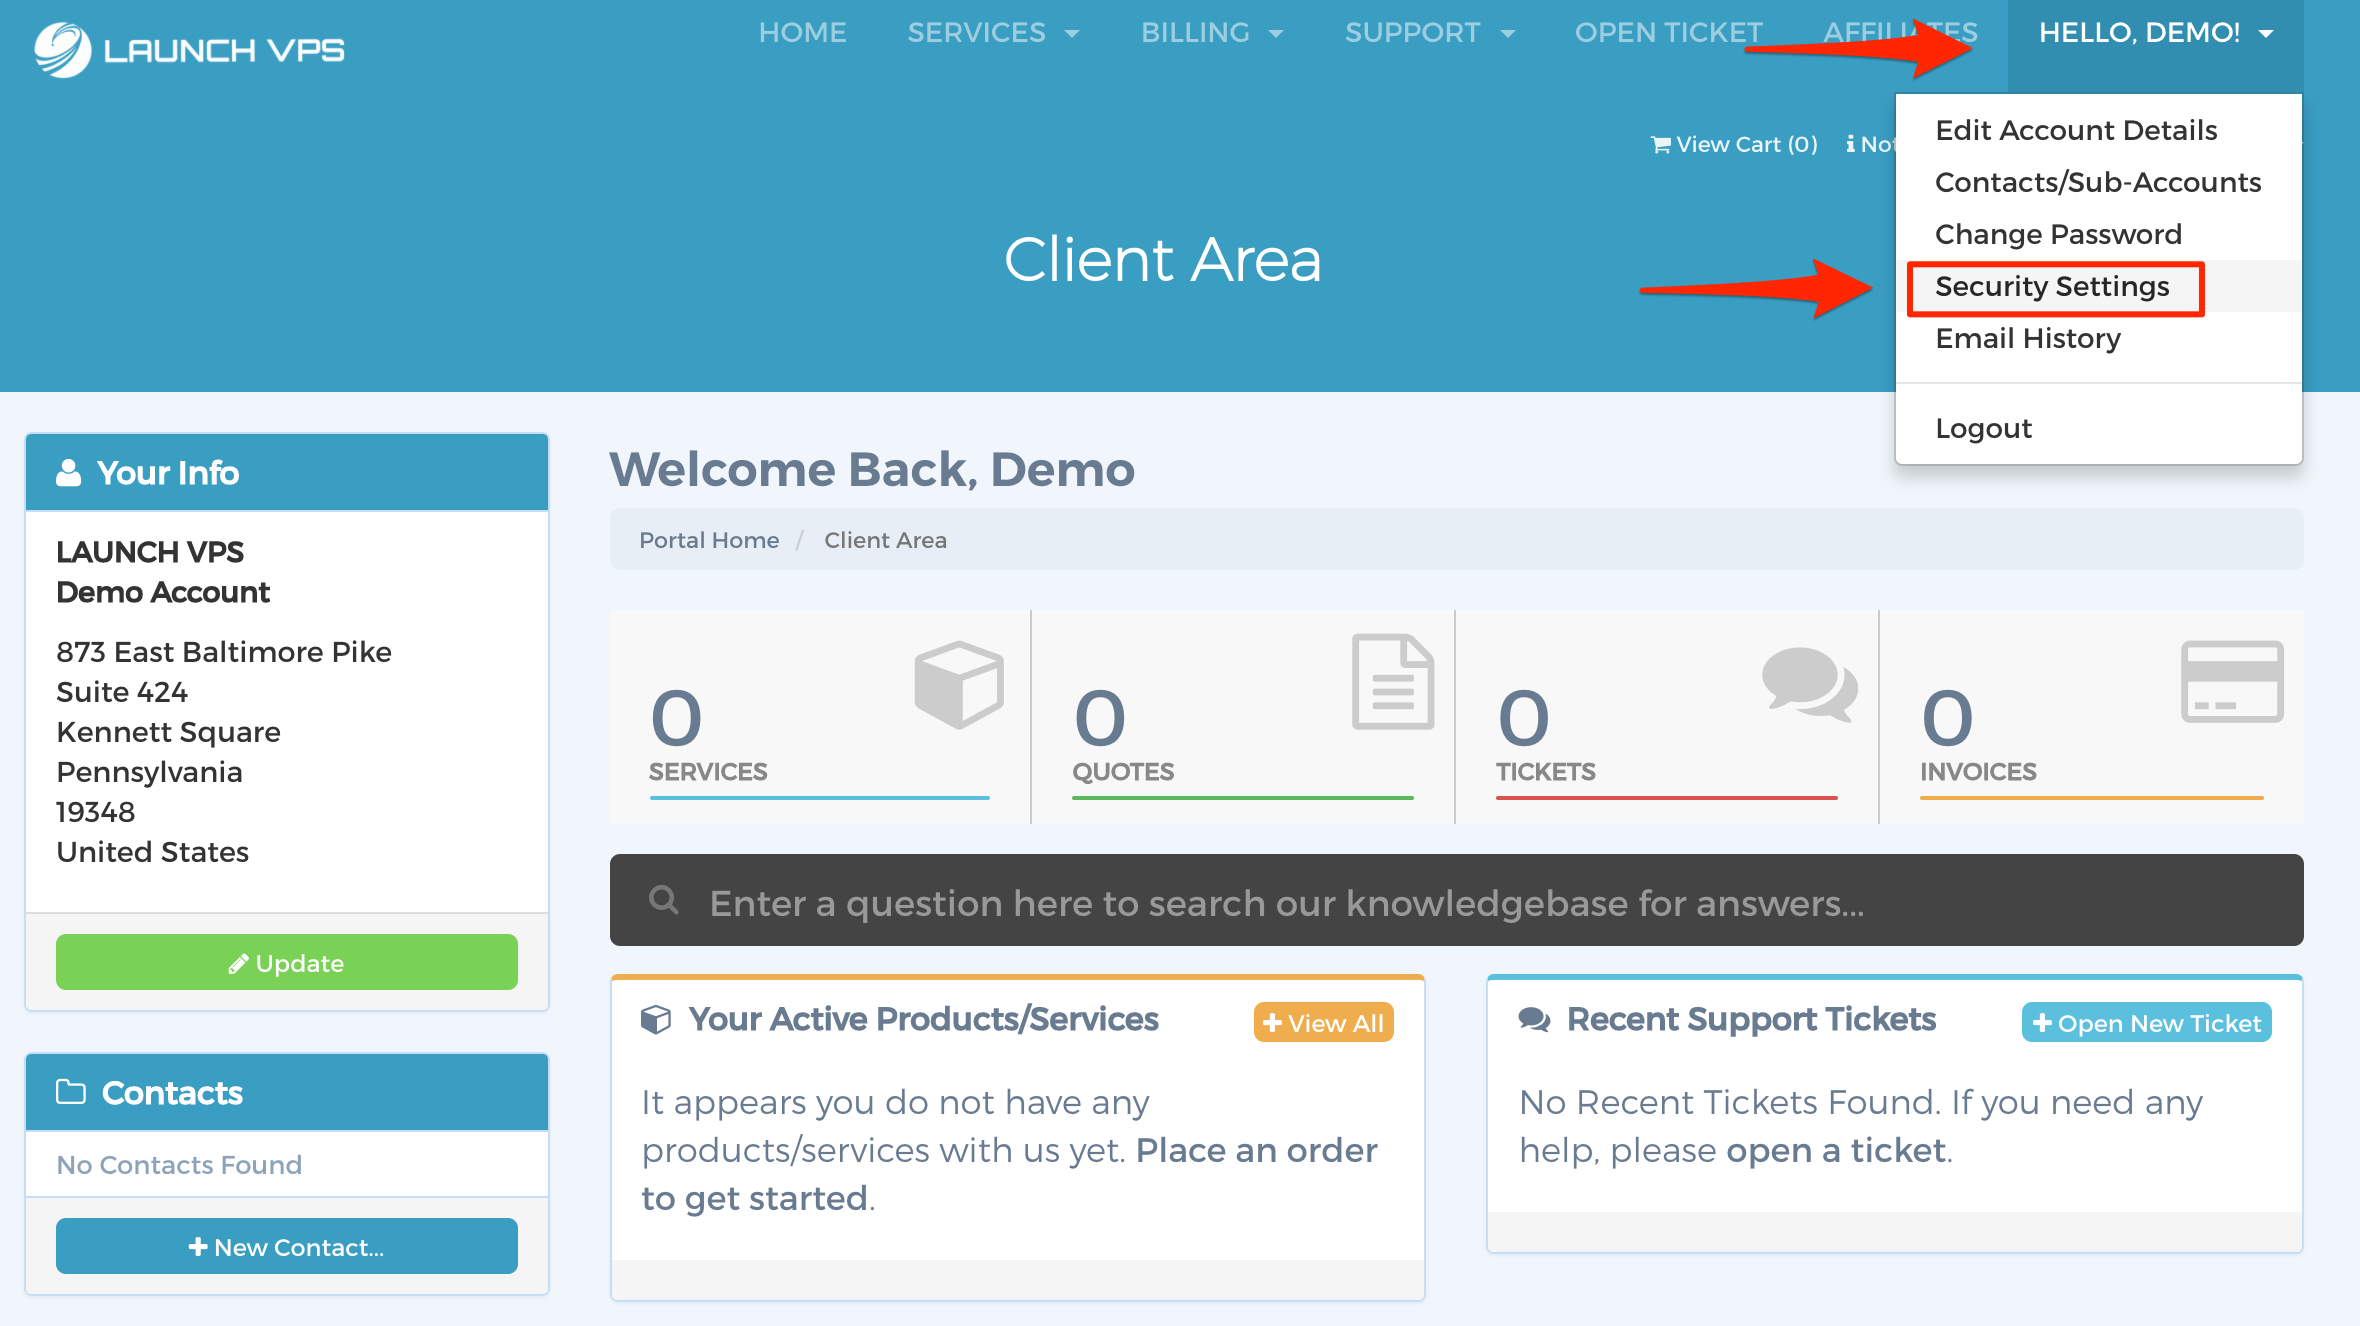
STEP 1: After logging into the control panel, navigate to the "Security Settings" as shown in the image below.
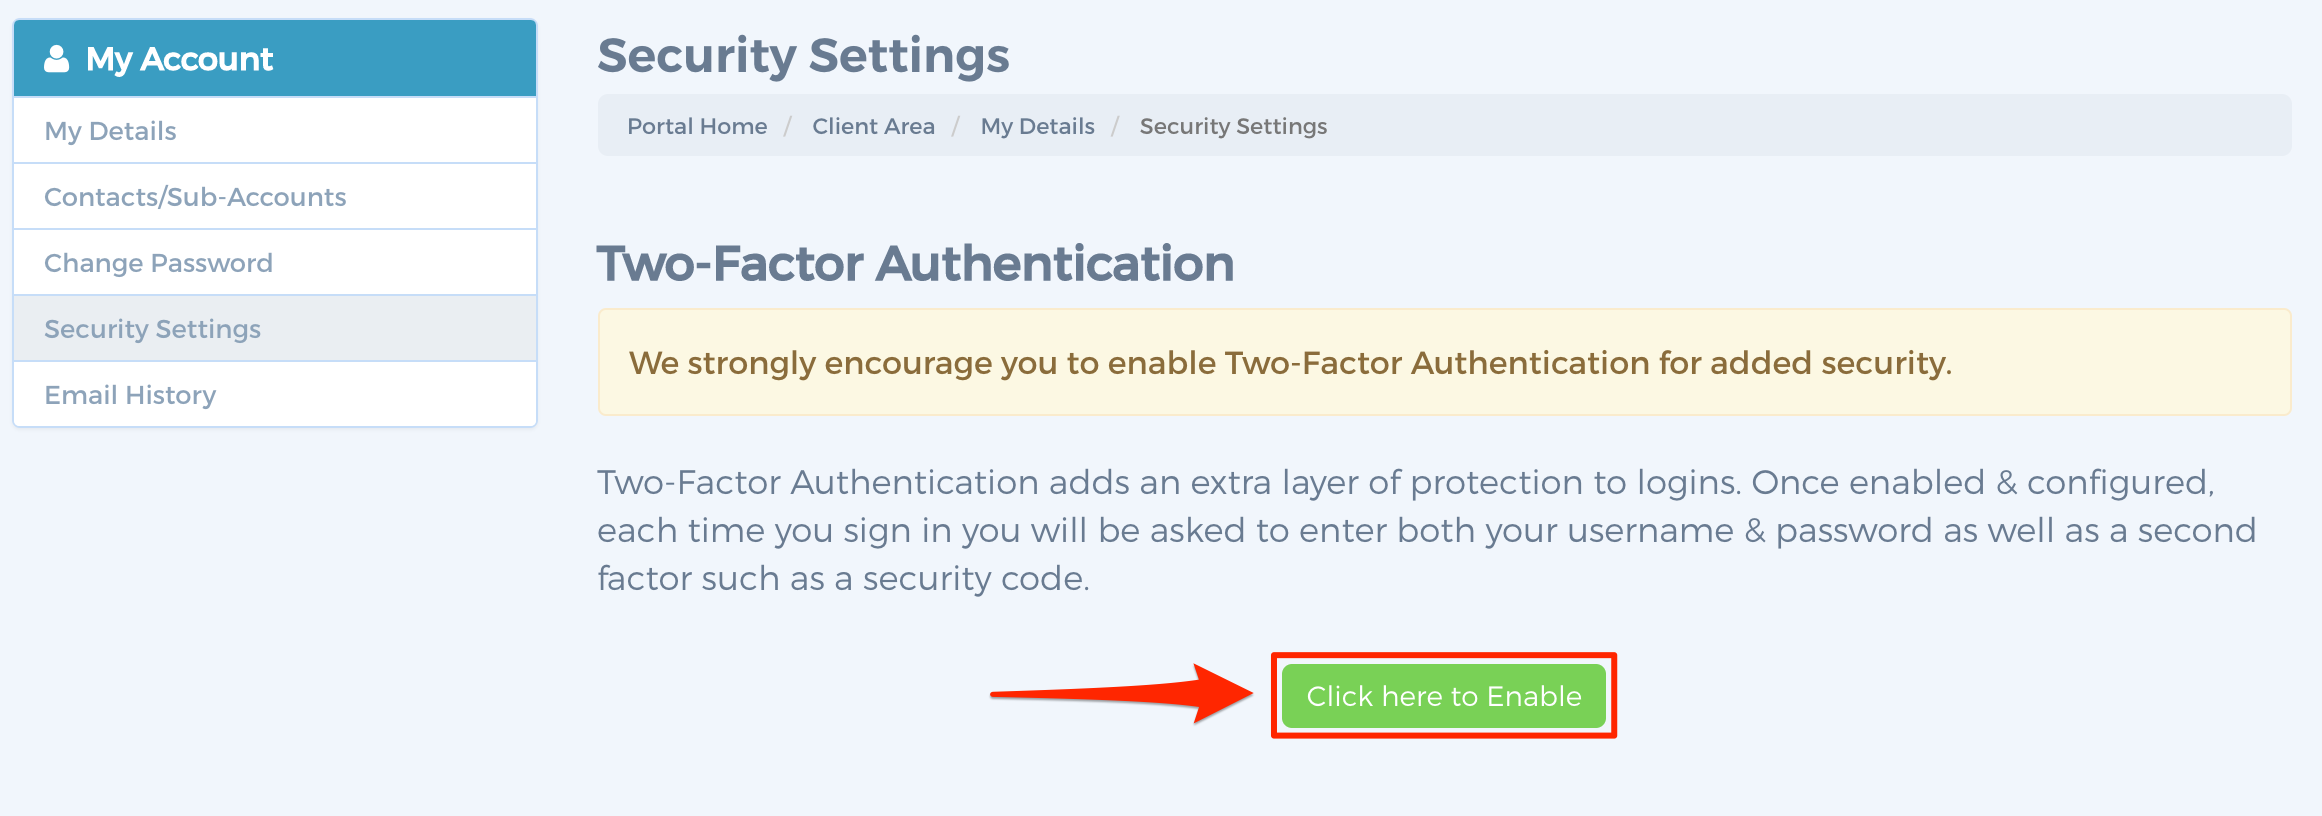
STEP 2: Click the "Click Here to Enable" button.
Step 3: Click the "Get Started" button.
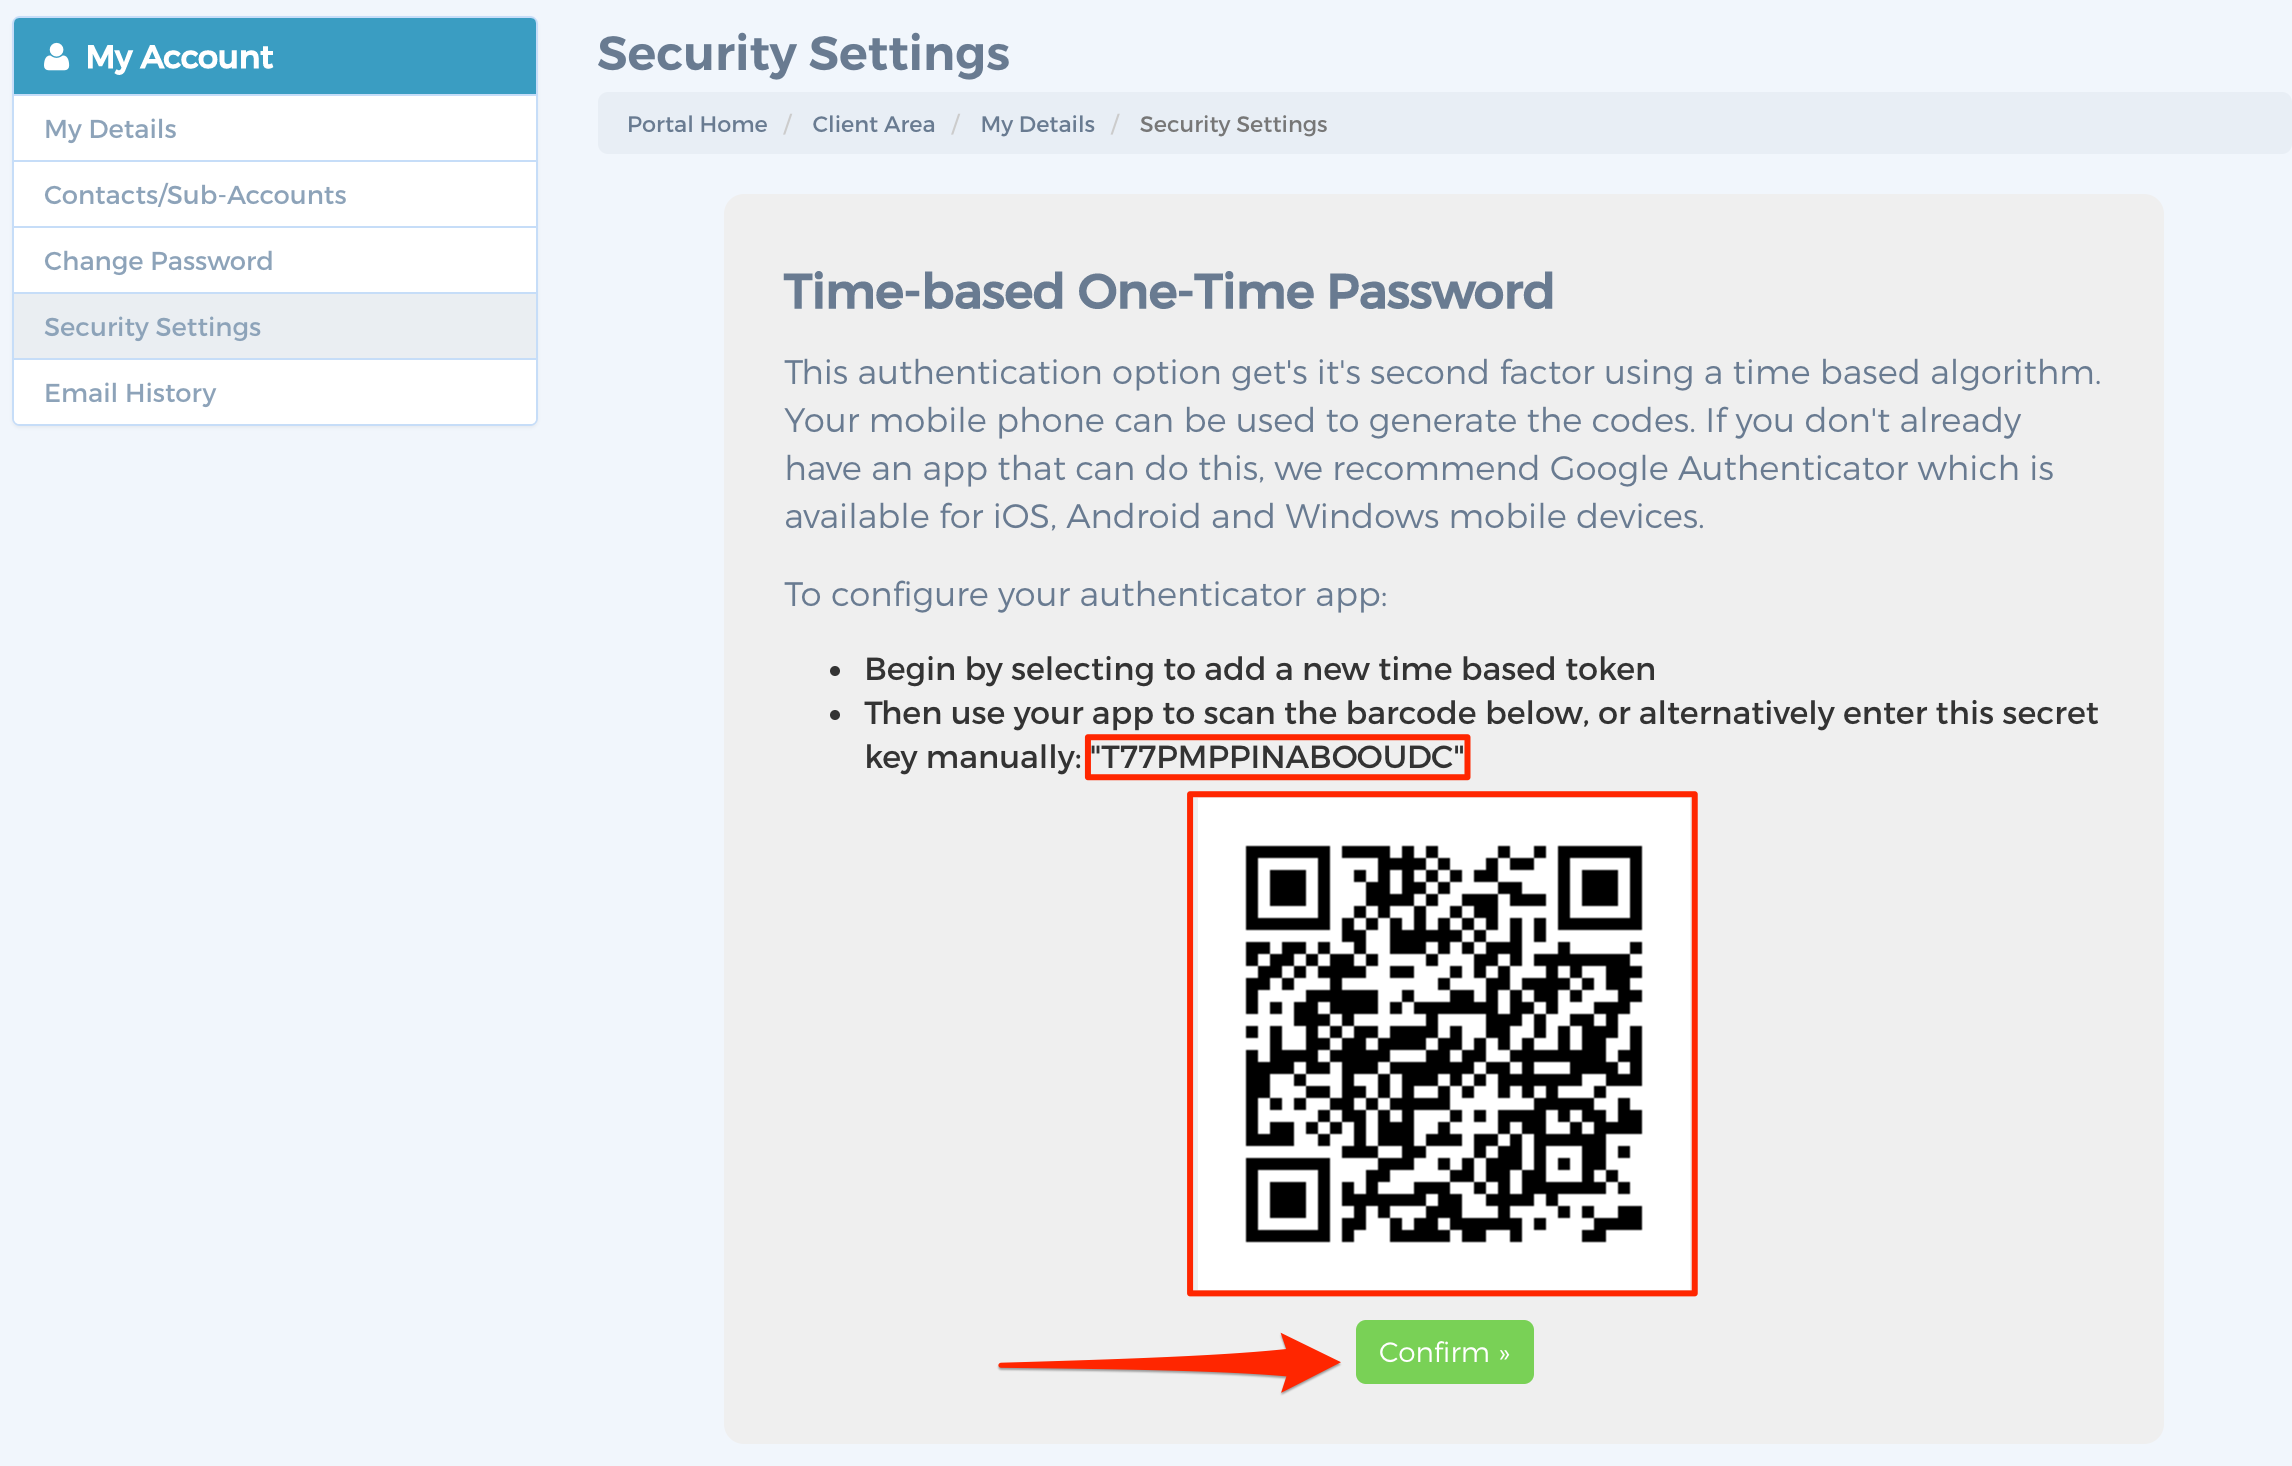
STEP 4: You are now displayed a QR code that can be scanned into your preferred OTP application. You can also manually enter the key as noted below.
STEP 5: You will need to verify that your client is displaying valid one-time password key codes. Enter the code displayed from your preferred two factor authentication client.
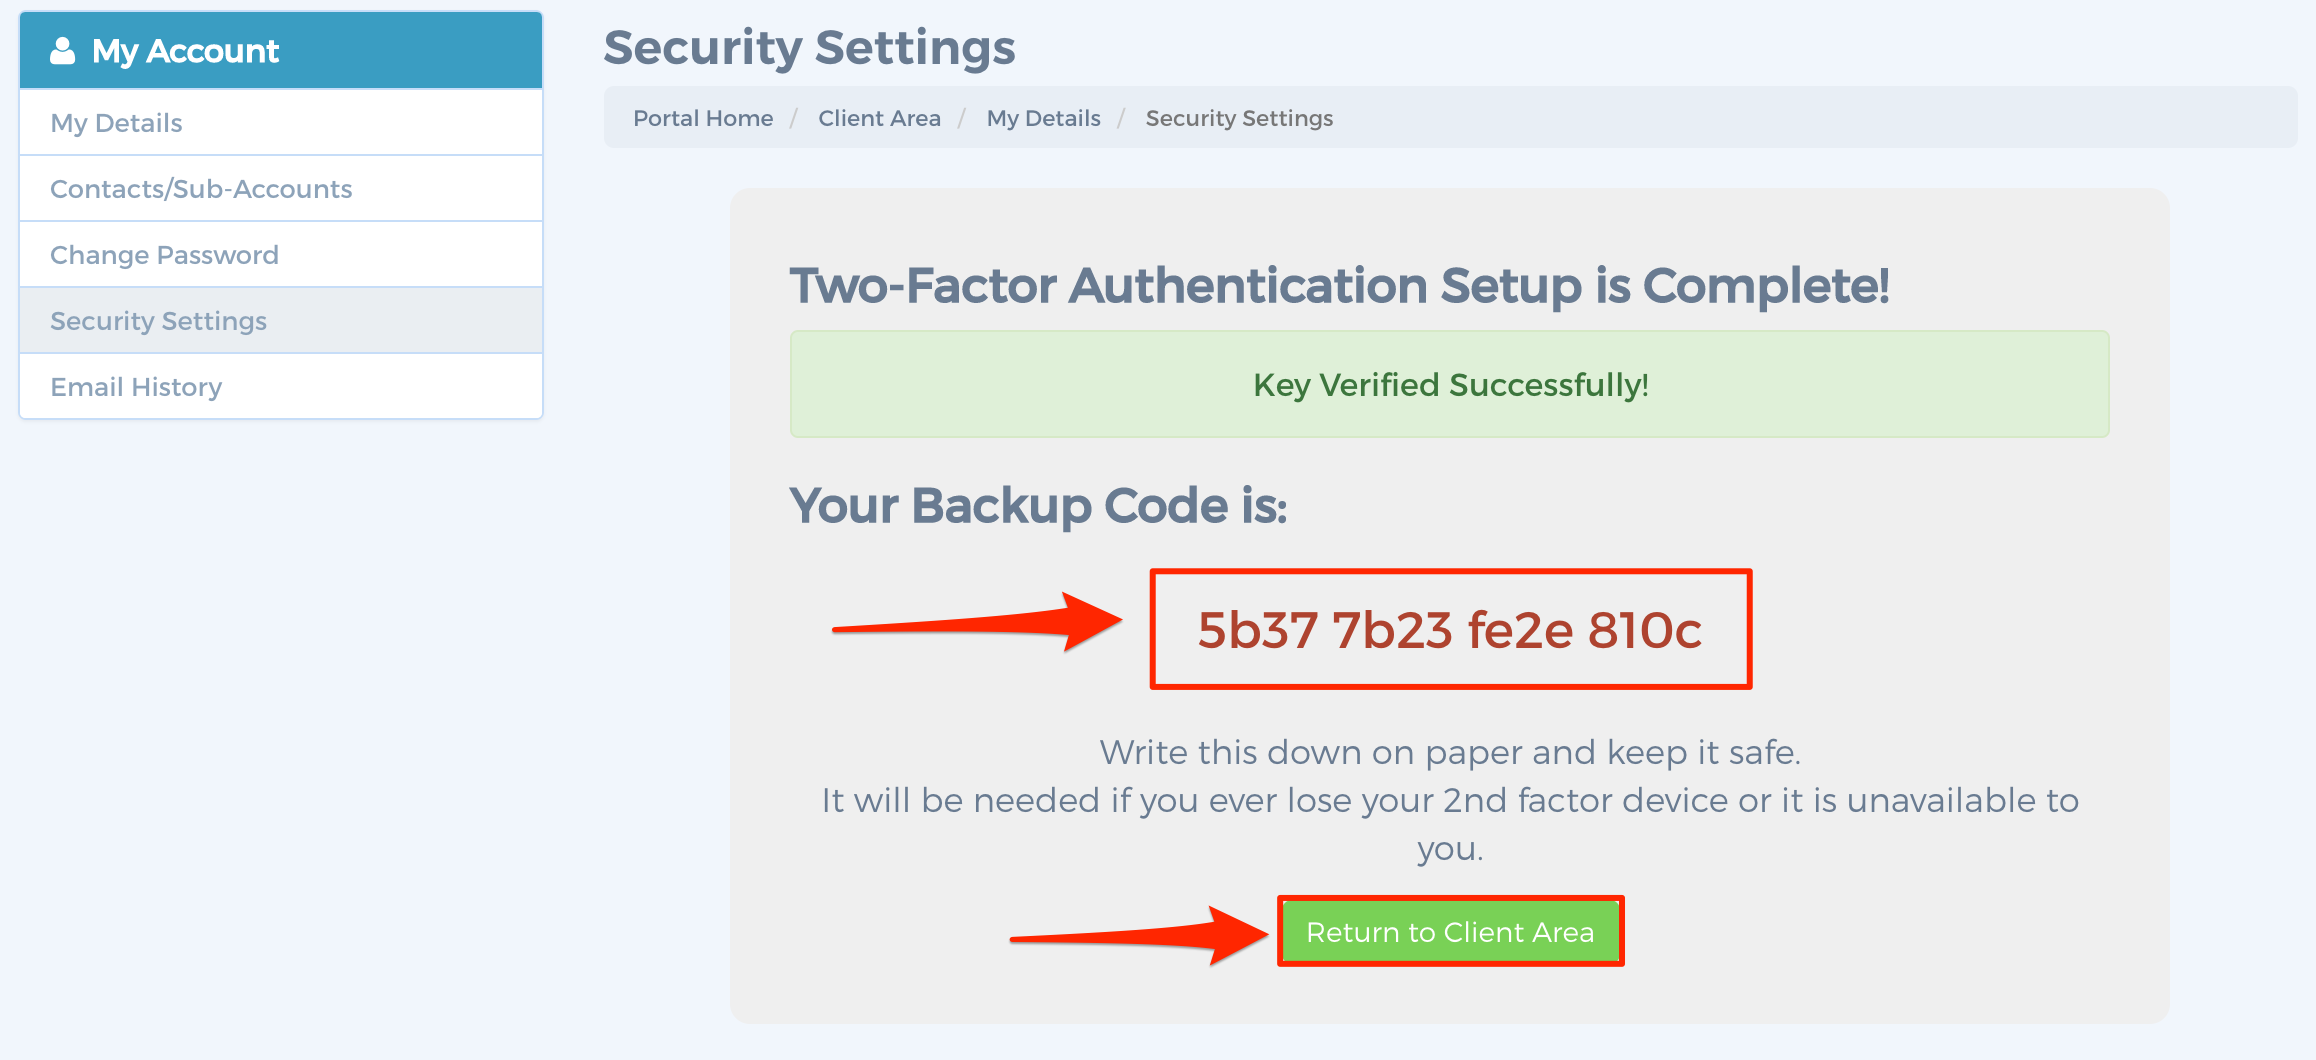
STEP 6: You will now be presented with a backup key code. This is required to access your account in the event that you do not have access to your two-factor authentication client application. Take note of this code and store it in a safe place.
Success! You now have two-factor authentication configured for your LaunchVPS control panel account. You can log-out and then log back in to fully test the new configuration.

